iOS SDK
In this tutorial we will show you how to make your ios Application.
Setup iOS SDK
First off all you need to download/update a few things before we get started.
Xcode
Make sure that you’ve installed the latest version of xcode, because you will need xcode for the whole project. You can install Xcode in the mac app store.
Download/update cocoapods
You can both update and install cocoapods by entering this command in your terminal:
sudo gem install cocoapods
If there are any errors make sure your gem is updated, you can update your gems by entering this command in your terminal:
sudo gem update --system
Swift
Download Swift 4.2 and above (we recommend to use Swift 5), because for this tutorial you will use Swift’s UI. At this link you can download swift:
Swif -https://swift.org/download/#snapshots
Github repository
At this link you will find a demo of a IOS file. You need to download the zip file and unzip it when you’ve downloaded the file.
Github-https://github.com/configwise/configwise-sdk-ios
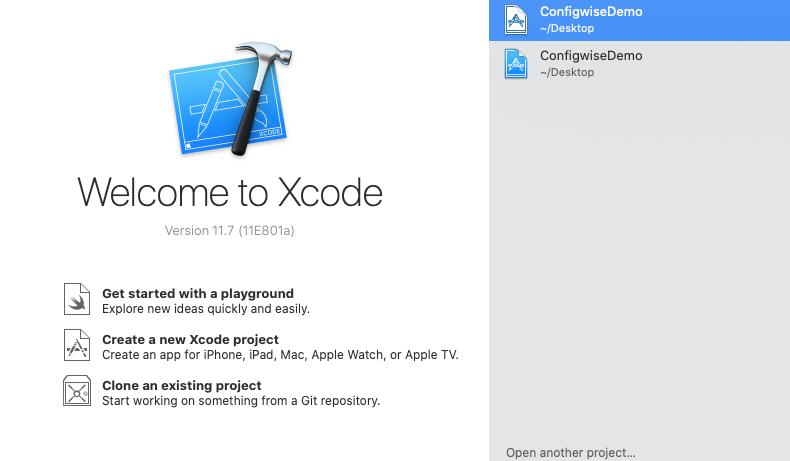
Now let’s begin by making a project in Xcode. To do this you need to open Xcode. When you’ve opened Xcode you will be greeted with this interface:
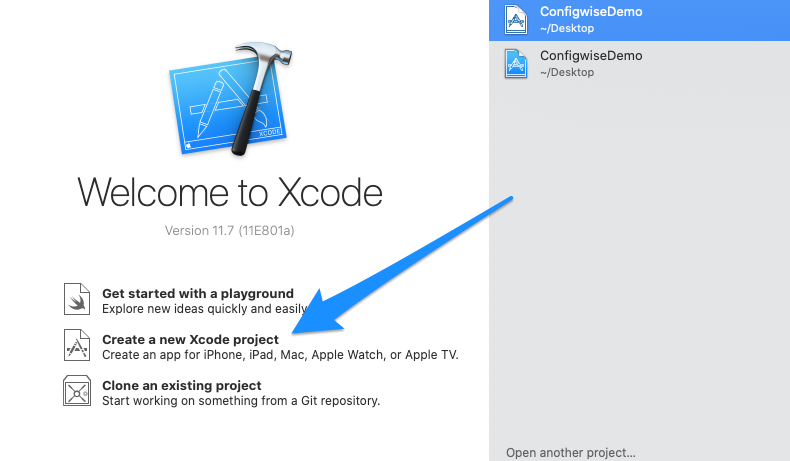
From this point you want to create a new Xcode project.
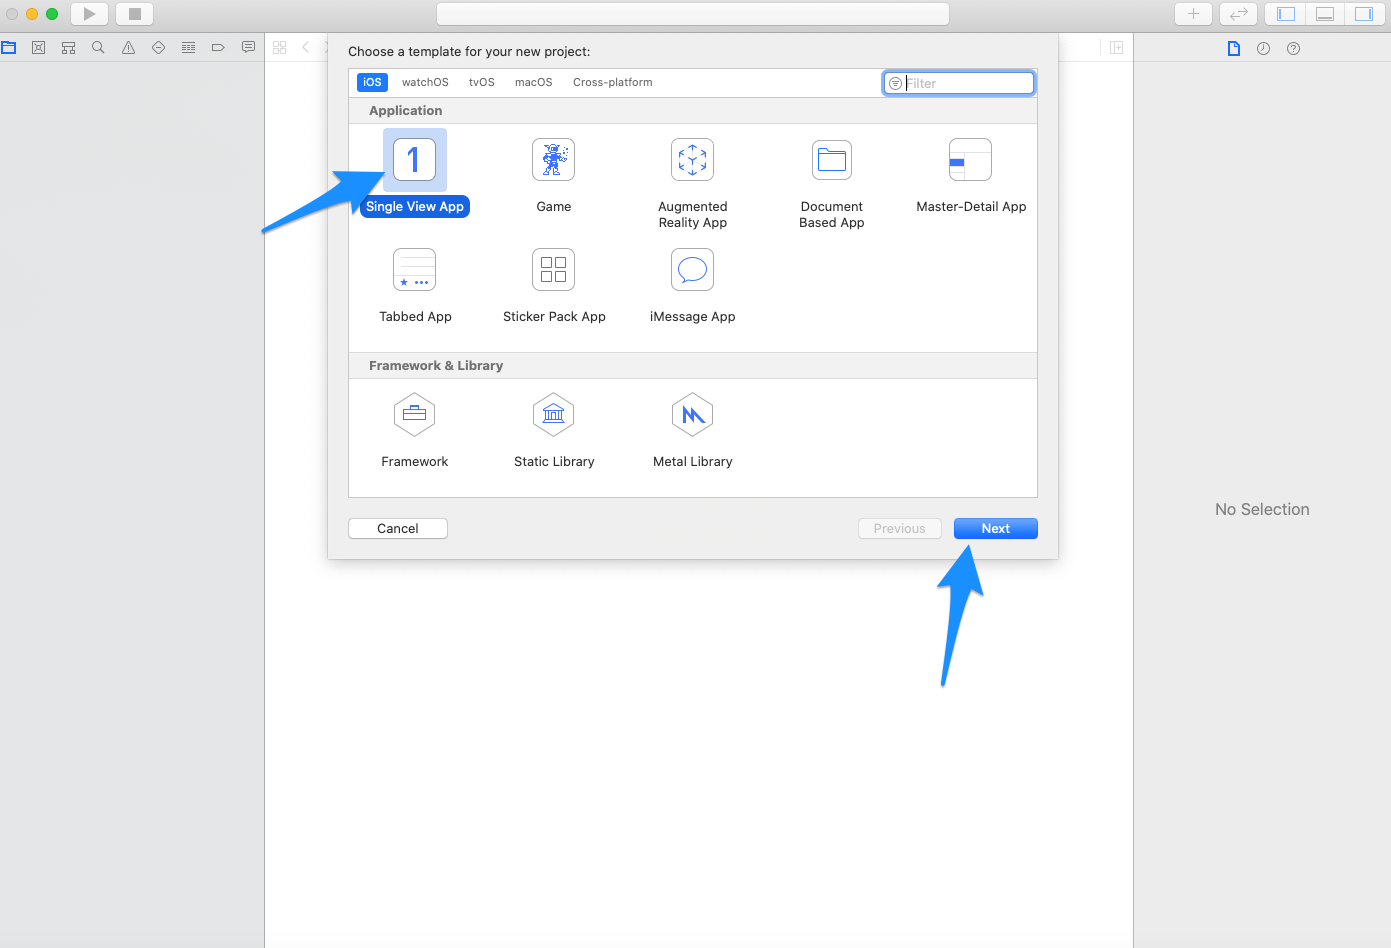
When you’ve clicked on “Create a new Xcode project” select a “Single view app”, after that press next.
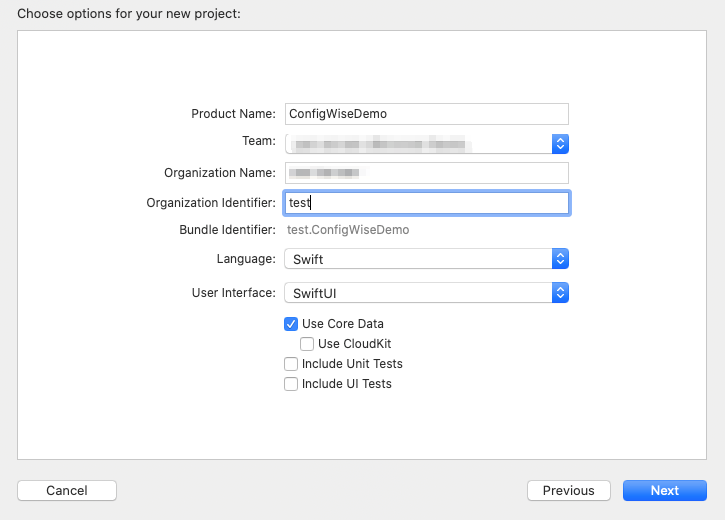
Once you’ve done that you need to add a product name, team(This is required, but you can always do this later on in the project). Then select language and change it to Swift, also select User interface and change it to swiftUI. After that you need to select “Use Core Data”.
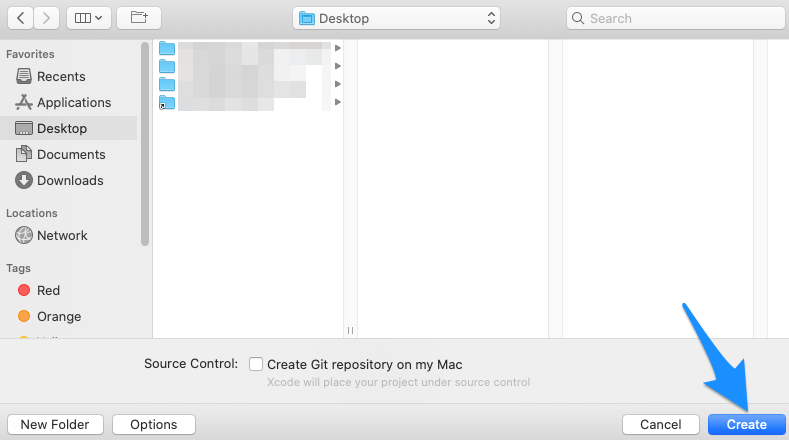
Then you need to choose a location and press create
Once you’ve completed that you need to open your terminal and enter the following commands:
cd <the direction to your project file>
In my case the command should be: cd Desktop/ConfigwiseDemo.
Now you need to create a podfile, you can do this by entering the following command:
pod init
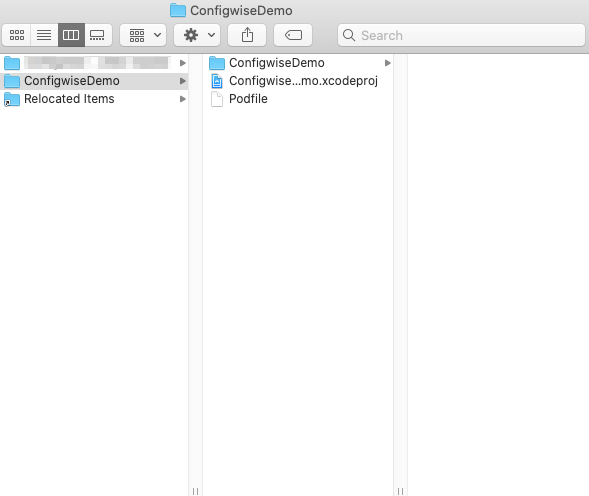
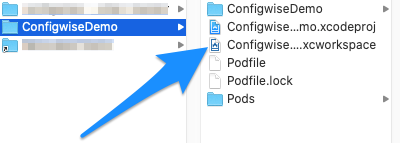
If that went well you now got a podfile in your project, just like this.
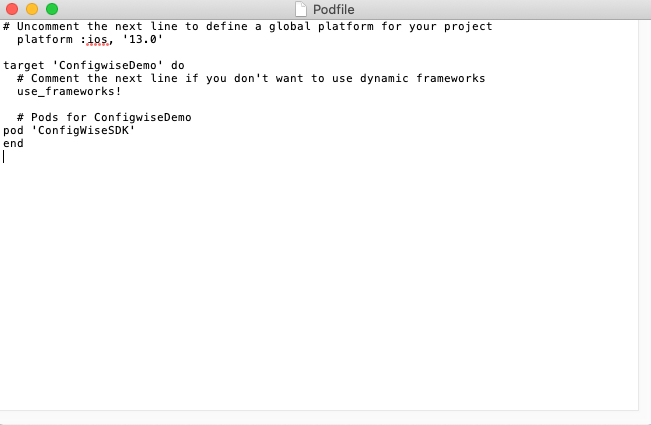
When you have a podfile in your project you need to edit this file. The first thing you need to do is uncomment line 2 “#platform :ios, '9.0'” and change the line to “platform :ios, '13.0'”. You need to change this because this is the minimal required ios platform. After you’ve done that you need to add the following line beneath ‘# Pods for ConfigwiseDemo’:
pod 'ConfigWiseSDK'
your podfile should look like this now.
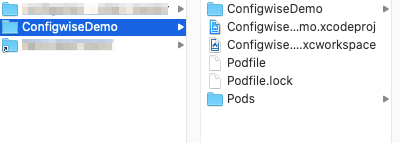
After this you need to install pods, which will lock your podfile so make sure your podfile is the same as this example. To install pods you need to go back to your terminal (make sure that you’re in the right directory) and enter the following command: pod install . After that command you should have these files in your project.
What you need to do now is open the workspace of your project.
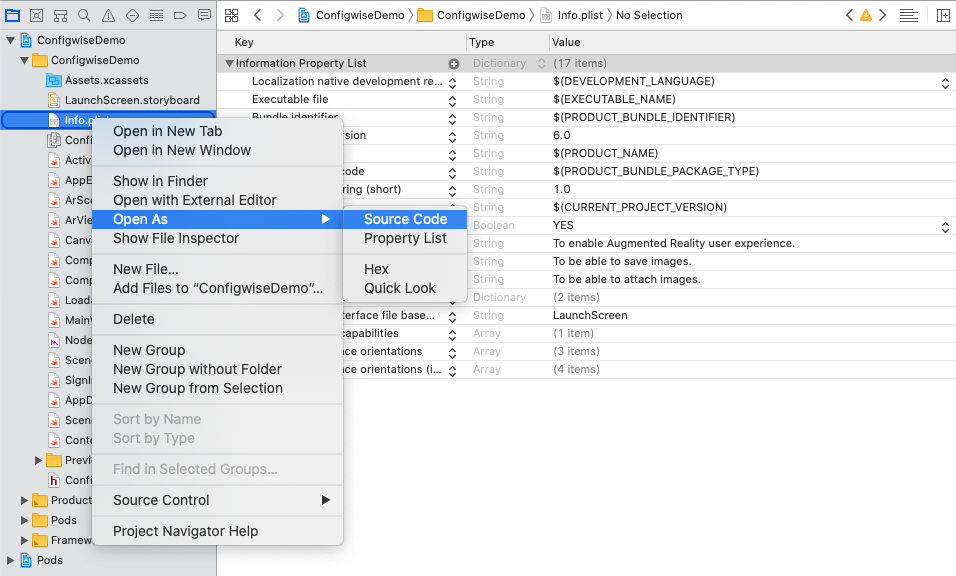
Now that you’re in the workspace you need to open the following file: Info.plist
You need to open this file as source code, you can do so by first left clicking on the file then hovering over “open as” and then at last you can select source code.
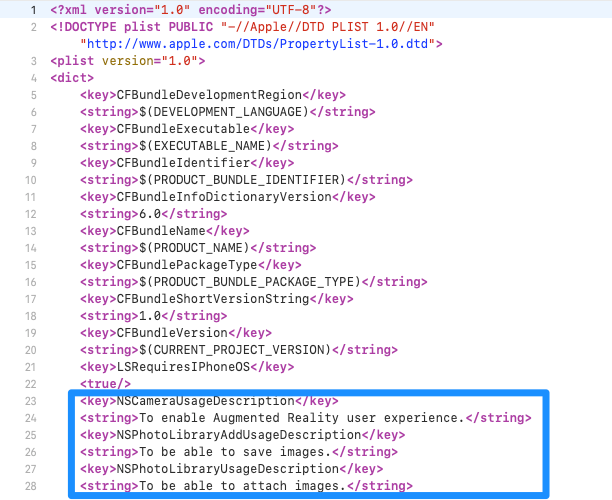
Once you’ve done that you need to add the following code to this file:
<key>NSCameraUsageDescription</key>

 <string>To enable Augmented Reality user experience.</string>

 <key>NSPhotoLibraryAddUsageDescription</key>

 <string>To be able to save images.</string>

 <key>NSPhotoLibraryUsageDescription</key>

 <string>To be able to attach images.</string>
These settings are required for AR usage - to permit your application to access the camera, photos of your phone.
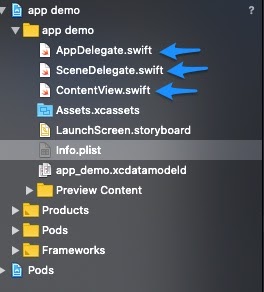
For the next part you need to remove some files from your project:
AppDelegate.swift
SceneDelegate.swift
ContentView.swif
Those three files will be replaced by our files
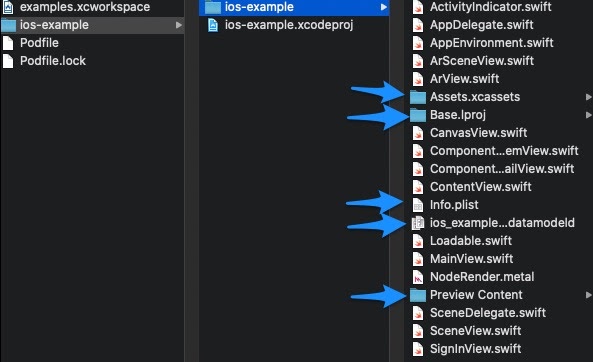
After you’ve done that you need to open the project that you downloaded via github and transfer everything EXCEPT these files/folders to the created xcode project:
Assets.xcassets
Base.lproj
Info.plist
Ios_example.xcdatamodeld
Preview Content
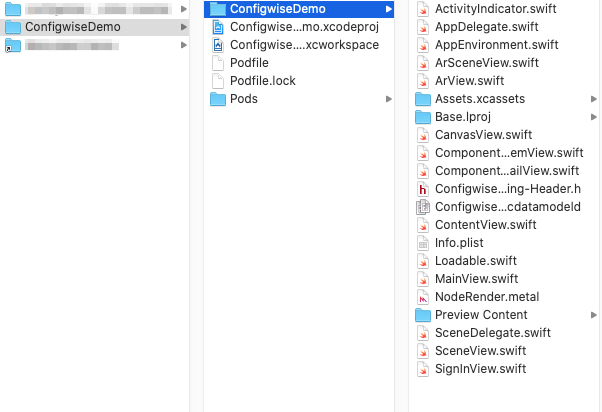
Once you’ve selected those files you need to transfer the files to your project so it looks like this:
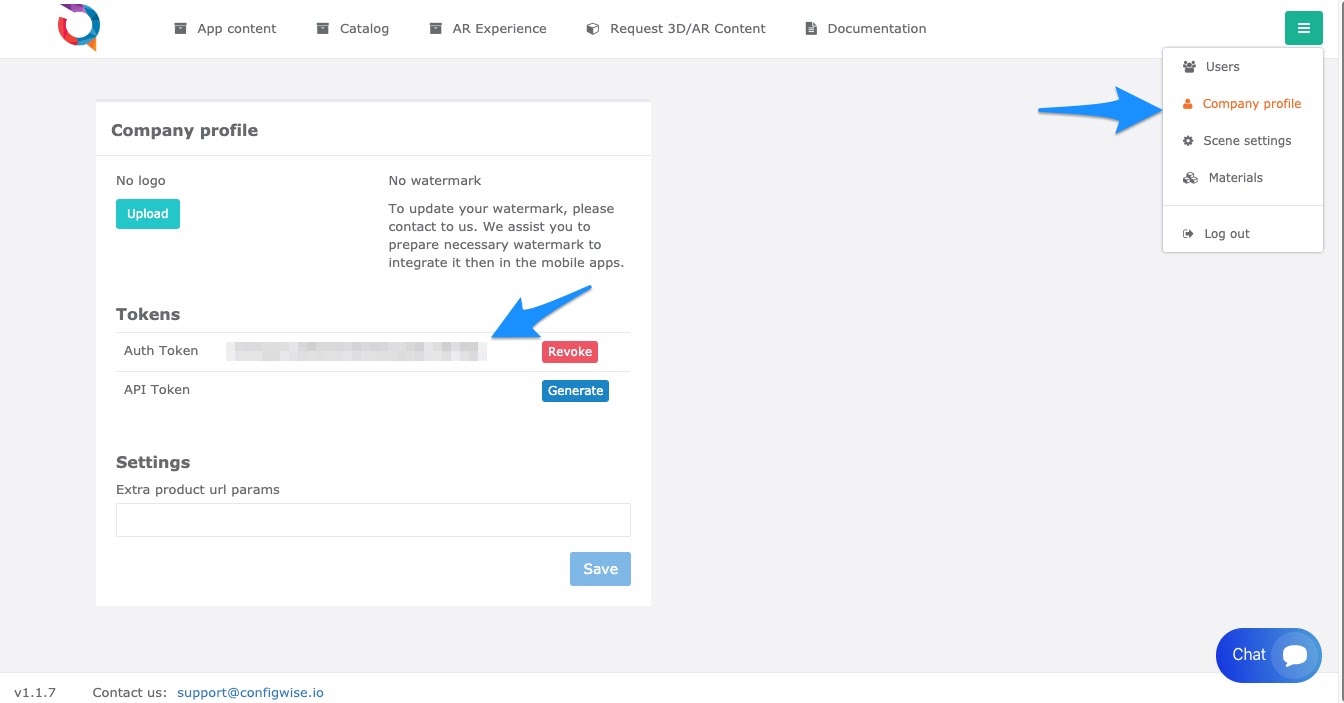
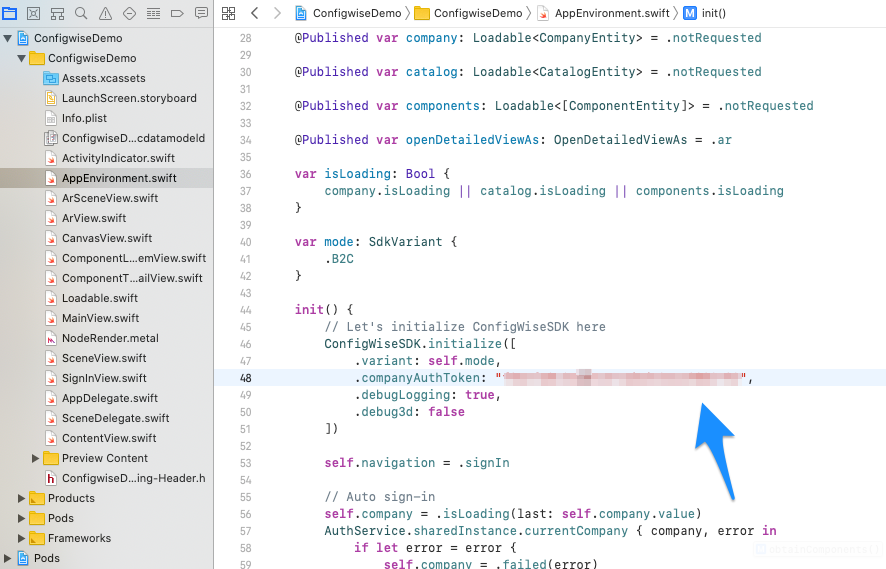
Now that the files are transferred you need to place your auth token in AppEnvironment.swift on line 48. To get your company auth token you need to log in to configwise and follow the arrows.
Now copy that code and replace the “YOUR_COMPANY_AUTH_TOKEN”.
At this point the project is done at a point you can run it. To run the build you first have to select a device (number 2) and then run it by pressing the run button (number 1) or press cmd+b.
If everything goes smoothly as planned with no error, than the should be a app icon popping up. Click the app and it will start loading the items.
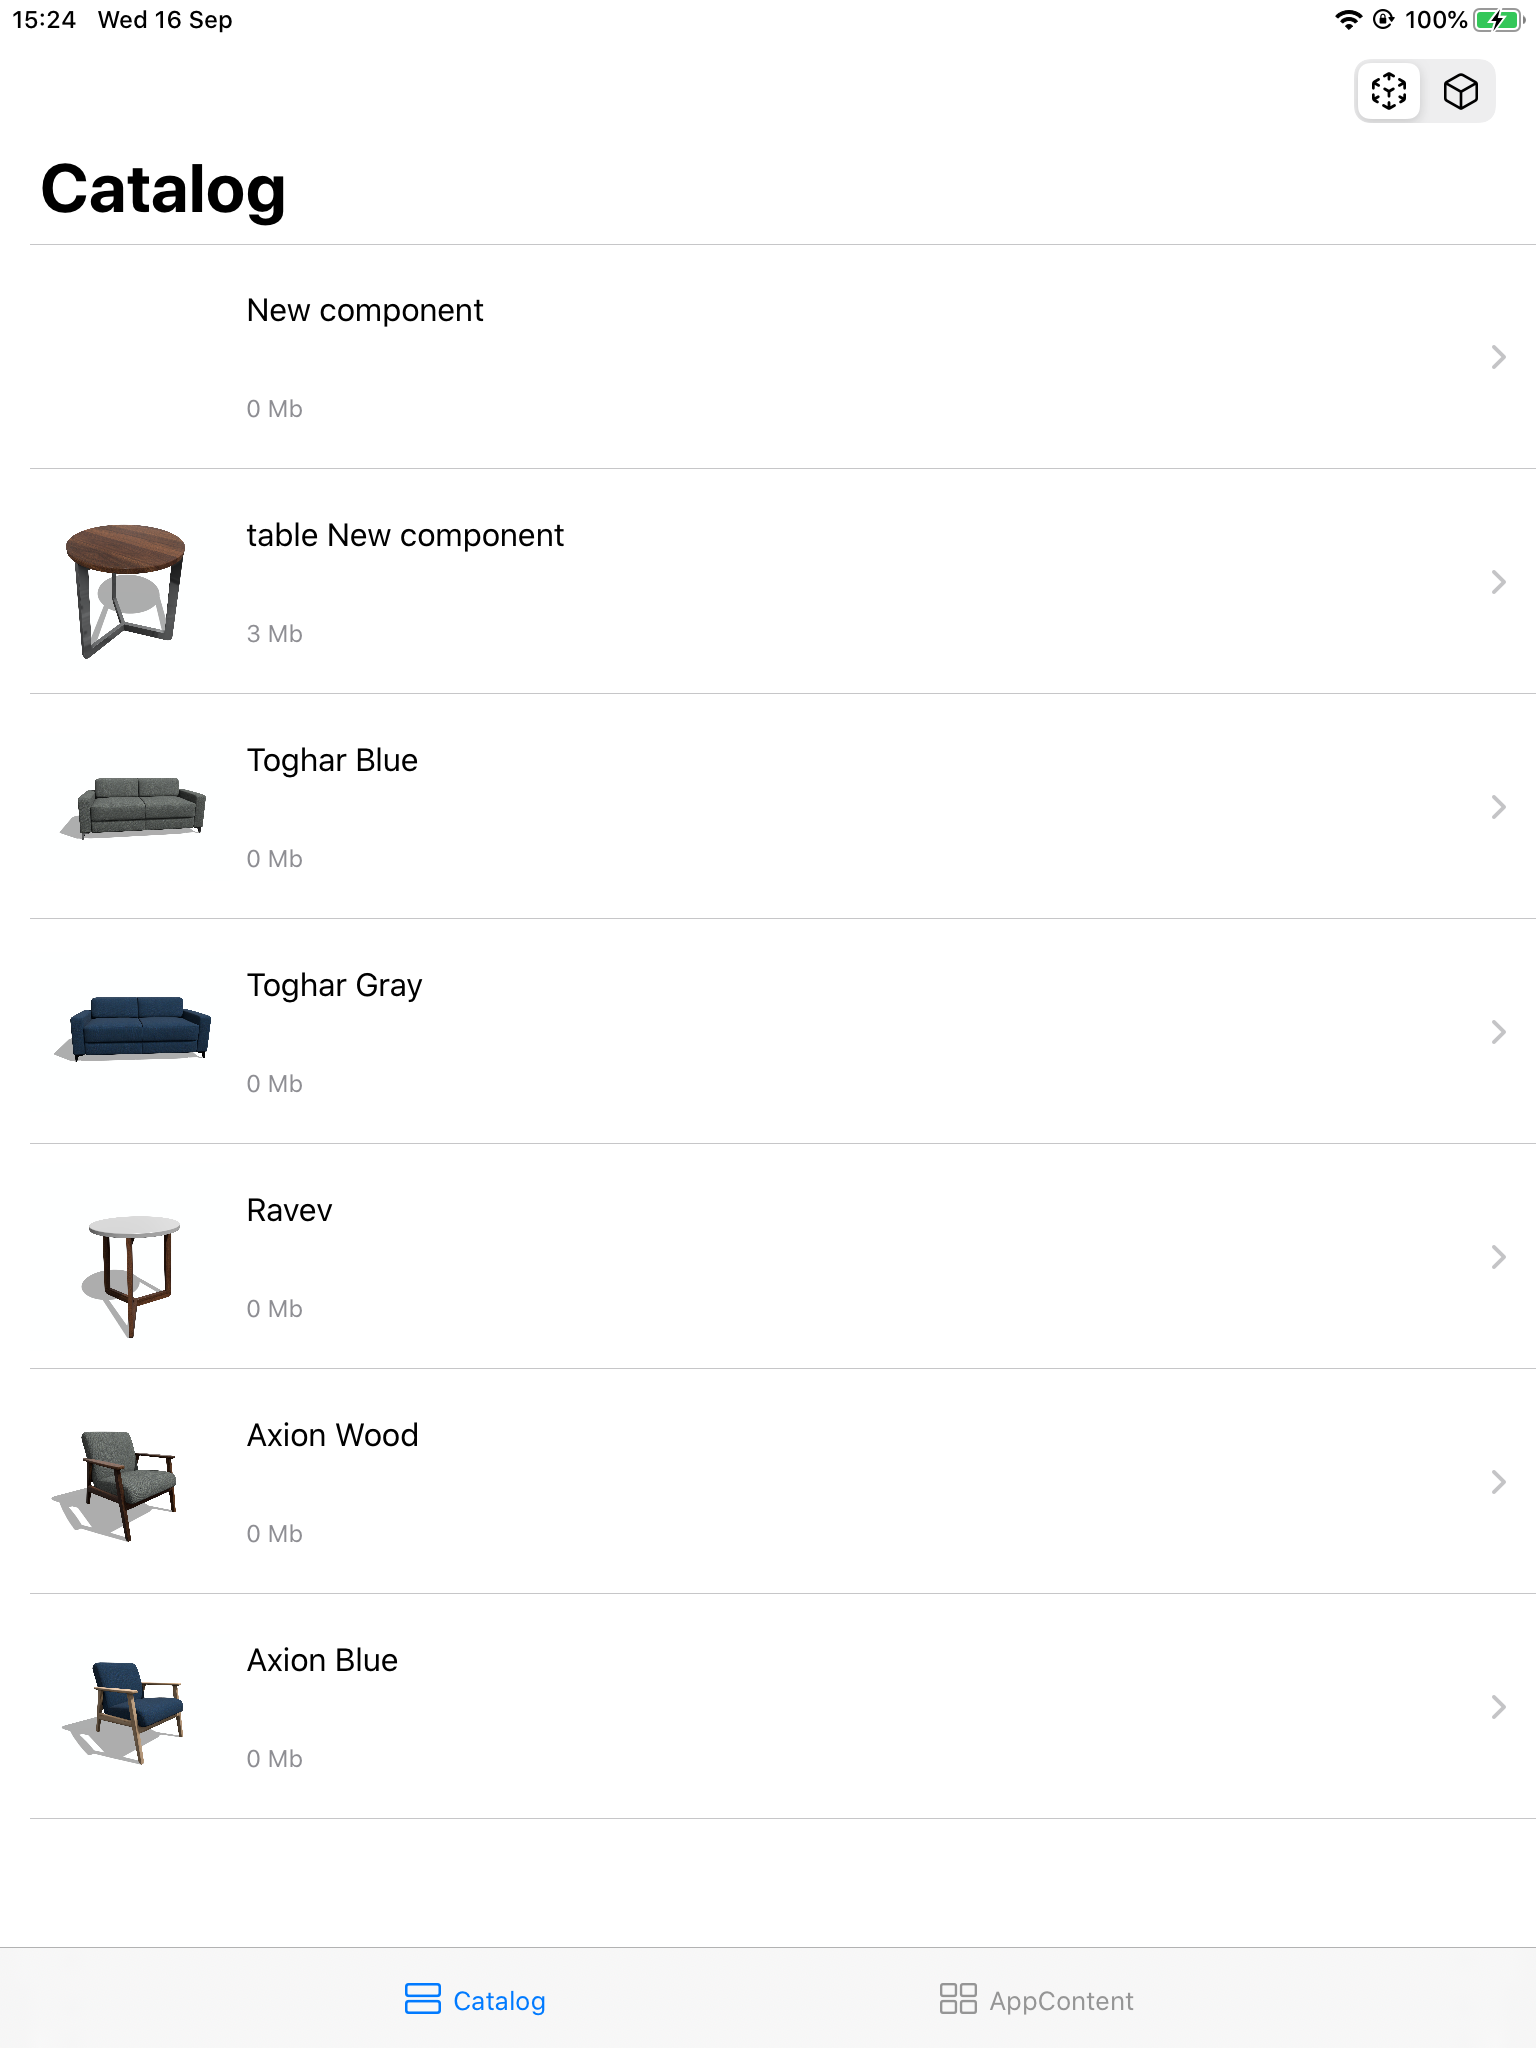
If everything is loaded the final product should look like this
